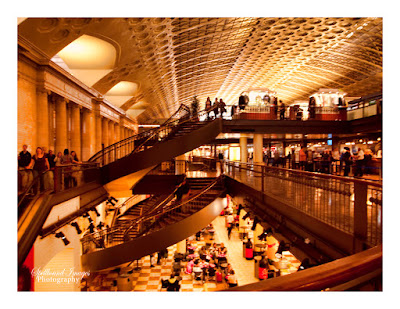
Shooting in low light situations is a challenge for almost any photographer. I happen to be one who loves to experiment with low lighting. I love to get out and do night shots… capturing just the ambient light from streetlights, skyscrapers, automobiles, etc. Ambient light… or available light is light that is not supplied by the photographer. It is basically the light that is already there… and the light you have to work with in any given situations.
In most cases for shooting low light situations you should use a tri-pod and a remote or cable release (if you have one) so you don’t cause any unnecessary movement of your camera. By using a tri-pod you stabilize your equipment resulting in better photo quality, by reducing blur or shake that is very prominent in low light situations. With a tri-pod you will also eliminate any grain from higher ISO’s (film speed). Now that’s not to say you cant do it without these extra items, but you should be very sure you become stable before you take your shot, and you will probably still experience some shake or movement.
In really low light situations a flash isn’t going to do you any good either. In most instances the flash wont even reach your subject, or you will have nothing to bounce off of. The sky is too far up when you are shooting outdoors, and even in a theater the ceilings are high and the walls are generally dark. If you can use a flash you will probably end up with those ugly harsh shadows behind your subject anyway. So best not to even attempt the flash.
Speaking of theaters… now you not only have low light, but also moving objects. A tri-pod is not going to work well in this environment. Your subjects are moving… you will have a hard time focusing on them, and they will be blurred… however, blurring is ok sometimes if that is what you are looking for, and can make some really cool captures. When working in a theater or event hall however you need to learn to use your camera settings. By bumping your ISO (or using faster film) and using a larger aperture you can begin to capture ambient light. Even though technology is a wonderful thing, remember by bumping your ISO you take the chance of getting a lot of grain in your images, so play with your settings and use the lowest ISO possible and the largest aperture possible. A large aperture is the lowest setting on your lens… if you can take it down to 1.8 then your shutter speed will be pretty fast. If you don’t have that low of an aperture then just get as low as you can. It can take some practice, and every lighting situation will be different so if you are going to shoot an event… get there early and work on camera settings as quickly as possible so you don’t miss any of the action.
Another good idea is to set your camera to continuous focus. That way when the lights go down your camera will continually refocus on your moving subject. Once you have all these things in order it should be pretty easy to photograph a play, a dance, or a concert. Also if you get a lot of grain from a higher ISO you can use a noise reduction process in post editing. There are a lot of good programs out there for this.
Every camera is different, so read your manual to find your custom settings. Take the challenge…go out doors and do some night shooting, or go to a local event where the lights are low or ever changing. If you’re strange like me… you might just enjoy the experiment and the outcome.
The image above was shot at 1/30th of a second with an F-stop of 3.0, and my ISO speed was at 400… pretty cool huh?
Love, Laughs, and Photographs,
Wendy


