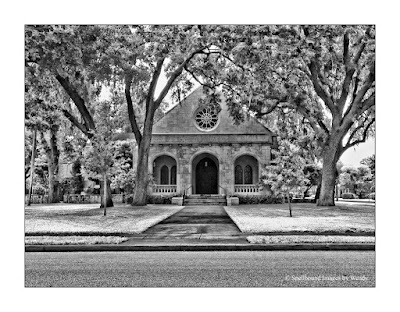
© Spellbound Images by Wendy - All Rights Reserved
There are a few different ways to achieve digital infrared photography or at least the look of infrared. Lets talk about the different ways we can achieve this in our images today.
Infrared photography used to be accomplished by using infrared film, and infrared filters. After the birth of digital photography you could have your camera modified to take infrared images by removing the hot mirror filter in front of the sensor. Now with Photoshop you can produce a pretty decent infrared image by using adjustment layers. Since I don't want to shoot film, and I certainly don't want to have my camera modified, I have chosen the last option for obtaining some decent infrared images.
First of all let me explain how to create an image that will best convert to infrared. I always talk about the golden hours for shooting outdoor images where you can not control light... where I'm using total natural light to create my photographs. Those would be the early morning hours just after sunrise, and the late evening hours just before sunset. However, for infrared photographs you would want to do just the opposite. It's crazy... but it's true! The best light for creating images that will best convert to infrared would be taken at the point of day when the sun is the brightest and highest. Probably between noon and 2:00 p.m. Depending on your time zone. Images shot at that time of day, if the sun is in fact very bright should most naturally be shot at F16, with an ISO of 100. Using a tripod is recommended for longer shutter speeds.
Once you've captured your images (I always shoot in RAW), you can begin the fun! Open your image in Photoshop (CS4 or higher). In your layers pallet click on your layers button and choose black and white to add a black and white layer mask.
Once you've added that layer mask you can move over to the adjustment tab and arrow down to find your infrared option (there are lots of other options you might want to try also).
Once you've converted your image to infrared you can play with your sliders to get the optimal look you are trying to achieve. Tweaking the green and yellow sliders will create the whites in the leaves and grass that are popular with infrared photography. You can also bring up the blues in the sky and water by tweaking the blue slider, and so on. When you are finished you can go back to your layers tab and adjust the opacity if you want to bring back some of the color in your images. Wallah! Flatten and save... your done!

Have fun creating some cool infrared photographs! Be sure to let me know how it works out for you!
Love, Laughs, and Photographs,
Wendy
All images captured with the Olympus E500 with a Zuiko 14 – 54 wide angle zoom, on Lexar Digital Media.


No comments:
Post a Comment